

NexCore Edge Model Deployment and Inference SOP
This guide covers deployment from model preparation through robot inference. Follow the instructions supplied for the deployed device, model version, and installation packages.
Before you start
Contact the responsible team for Policy / ACT packages, the NexInf client, and compatible wheels. Package layouts and dependencies can vary by delivery version; use packages that match your device and model. Replace example IPs, usernames, paths, and model names with values for your installation. Ask the device administrator if unsure.
01 · Prepare the Device and Model
Devices and network
- Inference device: Lumos Station Lite or Lumos MOS 2.
- Edge host: Ubuntu 22.04 with an NVIDIA discrete GPU. GPU requirements depend on the model and inference configuration; confirm compatibility and memory requirements with the delivery team.
- Network: connect the inference device and edge host to networks that can communicate according to the deployment design.
Check the GPU driver from an Ubuntu terminal:
nvidia-smiRetrieve a model from NexCore
- Sign in to the NexCore environment provided for your project. Open Model Management and select the target model.
- Get the model download or object storage address. Access is managed by the platform administrator; do not publicly share addresses that grant access.
- Use an approved download method for your network, then transfer the model to the edge host.
- Extract the weights under
nexinf/vla/weights/in the Policy installation directory, preserving the complete training export structure.
For a model named my_act, the directory may look like this:
nexinf/vla/weights/my_act/
└── 010000_ckpt/
    └── pretrained_model/
        ├── config.json
        ├── model.safetensors
        ├── robot_contract.json
        └── train_config.json
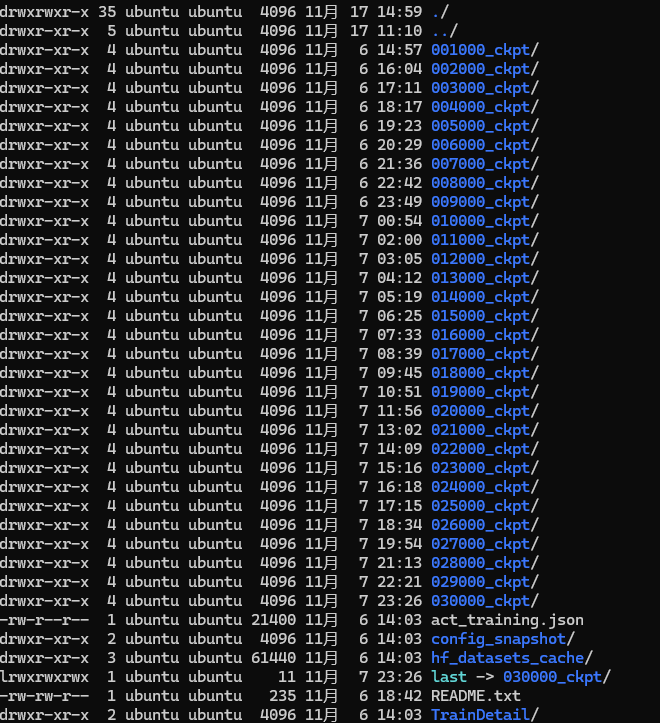
Model details may list checkpoints from multiple training steps. Review the model and select the checkpoint required for deployment.
02 · Install Policy and Runtime Dependencies
After receiving the Policy / ACT package, place it in the edge host user's home directory and extract it. The example assumes the package is named nexinf-policy-act.zip; use the actual filename you received.
unzip ~/nexinf-policy-act.zip -d ~/nexinf-policy-act
cd ~/nexinf-policy-act/nexinf-policy-act
The installer creates an isolated Python 3.11 environment and installs Policy, the ACT wheel, and runtime dependencies.
Configure the model and robot type
Edit:
~/nexinf-policy-act/nexinf-policy-act/nexinf/policy/config/config.tomlThe following ACT example must be adjusted for the target device and checkpoint:
[policy]
adapter = "act"

[policy.model]
checkpoint = "../../vla/weights/my_act/010000_ckpt"
state_dim = 16          # Station example; MOS uses 22
action_dim = 14         # Station example; MOS uses 20
robot_type = "station" # ACT can detect this from the checkpoint; other adapters use station or moscheckpointis resolved relative to this TOML file.- Point to a checkpoint directory to load that step. If supported by your version, you can point to the model directory to select the numerically latest step. Verify the naming convention and version documentation first.
state_dim,action_dim, androbot_typemust match the robot and checkpoint contract.
Example runtime configuration:
[runtime]
obs_bind = "0.0.0.0"
obs_port = 7030
action_bind = "0.0.0.0"
action_port = 7031

[policy.execution]
mode = "async"       # async or sync
inference_hz = 3.0    # Maximum async inference request rate
Set the listening address for your deployment topology. If Policy and NexInf connect over loopback on the same host, follow the loopback configuration below. If they run on separate devices, use addresses reachable by both.
Install and check
./install.sh
source ./nexinf/activate.sh
The first installation may download PyTorch CUDA dependencies; allow enough network time and disk space. After activation, check the CLI:
policy --help
policy --version
policy list
policy config --path
policy config
policy check
03 · Install the NexInf Client
Contact the responsible team for a NexInf client archive and wheels that match your device and Policy version. Copy the archive to the edge host and extract it. The example filename is nexinf-cloud-wheel.zip:
unzip ~/nexinf-cloud-wheel.zipCheck the network and configure the client
Check the robot's current IP from the edge host:
ping <robot_ip>If SSH access is needed, use the username and address assigned for your installation:
ssh <username>@<robot_ip>Edit the NexInf configuration file. The actual path depends on the extracted client; for example:
~/nexinf-cloud-wheel/nexinf/nexinf/nexinf/config/config.tomlSet the device type and robot address:
[basic]
robot_type = "mos" # mos or station-lite

[network]
robot_ip = "<robot_ip>" # Replace with the robot's current LAN IPv4 address
From the client directory, deploy the runtime environment to the robot:
./nexinf-cloud-wheel/install.shContinue after the script reports that deployment is complete.
04 · Configure and Start Inference
Before starting, confirm that Policy is installed, the model path is correct, NexInf is deployed to the robot, and the robot address matches the current network configuration.
Configure the connections
Policy configuration: edit the Policy file.
nano ~/nexinf-policy-act/nexinf-policy-act/nexinf/policy/config/config.tomlFor a loopback connection where Policy and NexInf connect through the same host:
[runtime]
obs_bind = "127.0.0.1"
obs_port = 7030
action_bind = "127.0.0.1"
action_port = 7031
NexInf configuration: edit the NexInf file.
nano ~/nexinf-cloud-wheel/nexinf/nexinf/nexinf/config/config.tomlFor a same-host loopback connection, check these values:
[frp]
enable = false

[frp.policy]
service_address = "127.0.0.1"
observation_port = 7030
action_port = 7031
If Policy and NexInf run on different hosts, configure addresses that are reachable in both directions and allow the required ports through the network policy.
Start the services
Start Policy: in each new terminal, activate the Policy environment:
cd ~/nexinf-policy-act
source ./nexinf/activate.sh
After checks pass, start the service:
policy runConfirm the robot type, dimensions, mapping, and checkpoint in the logs. After NexInf connects, confirm the observation and action channels are connected. Press Ctrl+C to stop the service.
Start NexInf: in another terminal, activate the NexInf environment:
cd ~/nexinf-cloud-wheel/nexinf-cloud-wheel
source ./nexinf/activate.sh
Start the middleware, then the Policy channel:
midserver run
nexinf run --policy
Station Lite middleware may be configured to start at boot according to the device delivery plan. MOS deployments may require manual unlocking and starting of the middleware on the device. Press Ctrl+C to stop foreground services.
05 · Robot Inference Examples
Station Lite
MOS
06 · Verify and Troubleshoot
Before robot inference, confirm:
nvidia-smidetects the GPU and the driver and CUDA dependencies match the delivery requirements.- Policy checks pass and the configuration points to the correct checkpoint.
robot_type, state dimension, and action dimension match the robot and model.- The edge host can reach the robot and
robot_ipis current. - Policy and NexInf use matching observation and action ports, and logs show connected channels.
- The run follows the site's safety procedure, with an operator ready to stop inference.
For connection failures, check the robot IP, network reachability, ports, and bind addresses. For model loading failures, check the checkpoint path, directory structure, robot type, and dimensions. If versions or configuration do not match, contact the device delivery team for the corresponding instructions.